

I did it…I finally took the plunge and painted my fridge. Ahhhh!
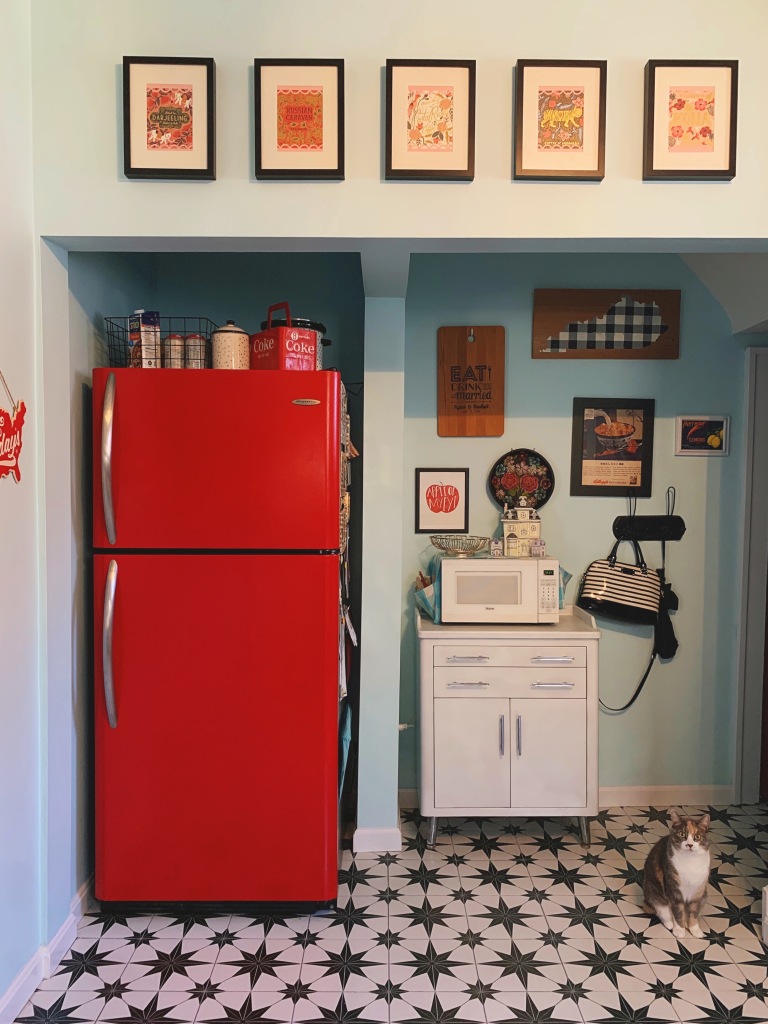
In all seriousness though, I’m so glad I did it. My dream is to have vintage 50s appliances (or retro reproductions), but the budget just doesn’t fit that dream at the moment. In the meantime, a modern fridge painted cherry red does the trick!
I did my DIY research and decided this tutorial was the best course of action. I wanted to roll it on versus spraying it for more control, especially since it’s currently winter and I can’t easily spray paint. I pretty much followed this tutorial to the letter, but I used a glossy paint instead of satin. Retro fridges are usually shiny, so I wanted that look. Plus, glossy paint is easier to keep clean! Also, I didn’t paint the handles. I wanted a similar look to the chrome details on retro appliances, and not painting the most touched surface of the fridge will help with longevity.
I ended up needing three coats since the red was so vibrant. I have a few imperfections on the finish, but it looks pretty darn good for an appliance painting novice 😉


Time will tell how well it holds up, so I’ll have to do an update on the project in a year or so. Next up is the stove, which I’ll need to do with high-heat spray paint, so that will be a project for warmer months. Stay tuned!


This is amazing! Can you share what exactly the red paint is that you used? Thanks!
LikeLike
Sorry! Just saw this comment. I just used a standard red glossy paint from Lowes. First using a primer that adheres to metal is key though!
LikeLike
What did you use for the handle?
LikeLike
I didn’t paint the handle, I just took it off while painting and then put it back on. Some people paint the hardware, but it tends to wear off, so I left them as is.
LikeLike