

 Many of my projects during lockdown have been organization focused. Being stuck in your house for months on end makes you really focus on what does and doesn’t work. With that in mind, I decided to tackle the problem area at the top of our stove. Because the piping for our gas line sticks out from the wall, our stove has to sit several inches from the wall. This means we’ve lost a few utensils back there…and dust, lots of dust. To combat this problem, I decided an over the stove shelf was needed.
I had seen these types of shelves on Pinterest (like the one pictured above) and it looked fairly easy to make. Most people build these to add extra shelving for items like spices. However, I also wanted mine to sit atop the top lip of the stove AND cover the gap from the stove to the wall. This required some adjustments to the design. In order for it to sit flush against the wall, I needed to make little cut outs for the lip of our countertop. Below are details and supplies I used to make it, and some of the mistakes I made along the way…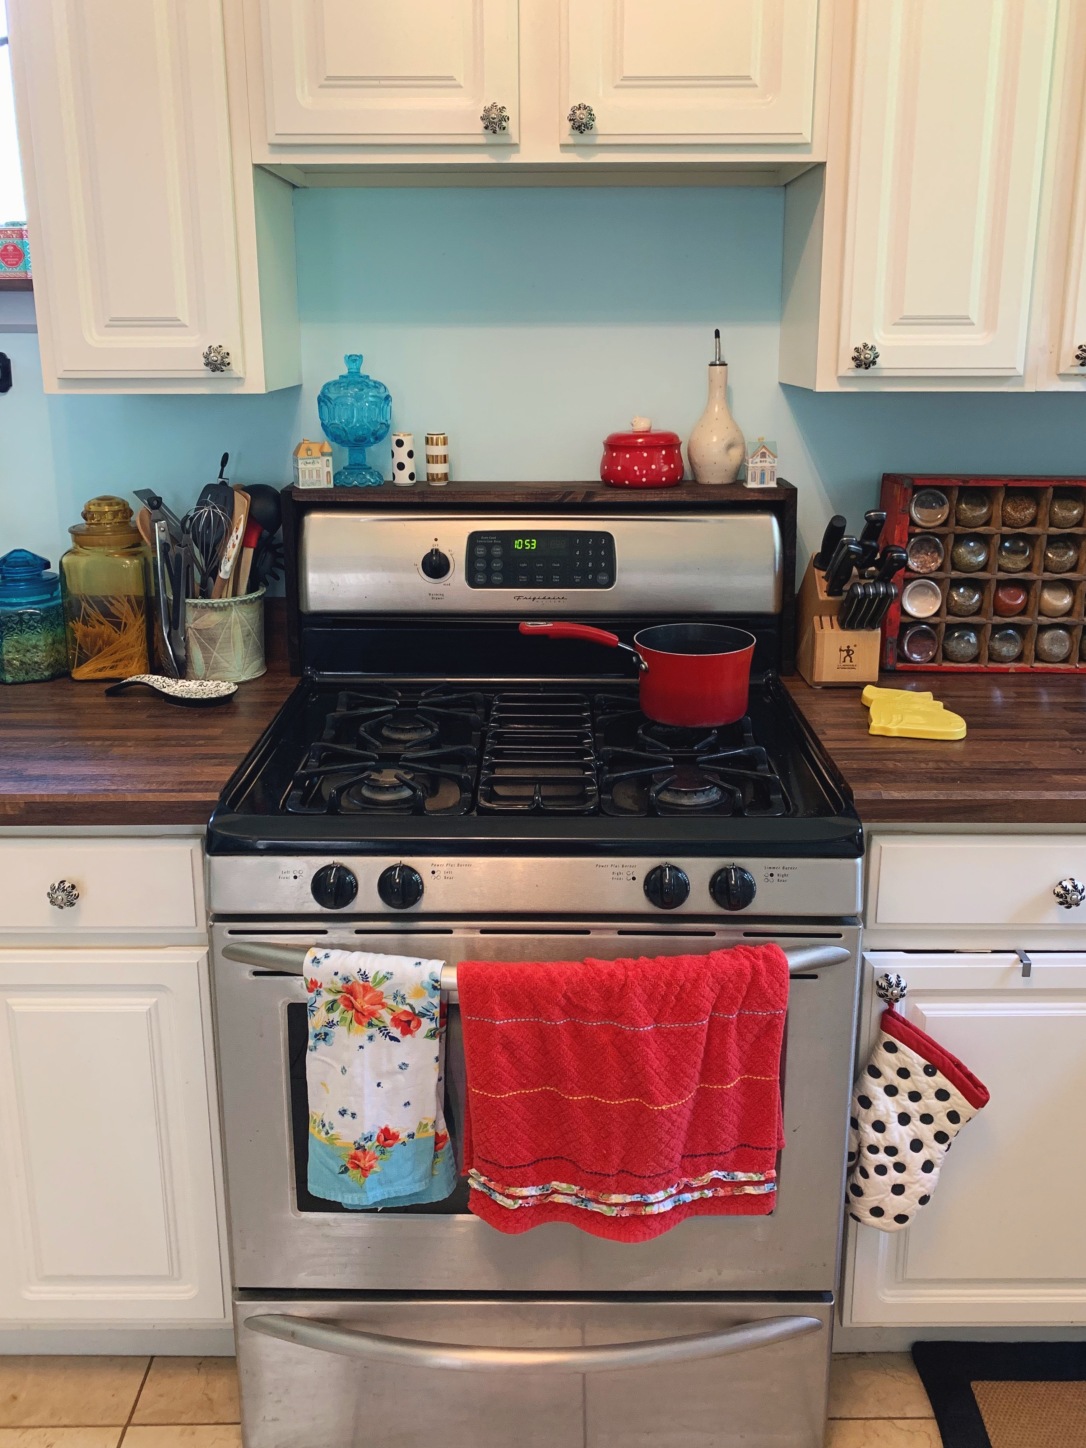

SUPPLIES
- Stain-grade wood (or paint-grade wood if you want yours painted)
- Circular saw
- screws (sized for thickness of your wood boards)
- drill
- drill bit (to pre-drill screw holes)
- measuring tape
- pencil
- straight edge
- sand paper
- stain or paint
- paint brush or rag
- polyurethane (optional)
DIRECTIONS
- I started by measuring and drawing out a diagram of my dimensions. I needed the shelf to fit snugly over the top of the stove, and also reach the back wall. Beyond the standard width, height and depth, I needed the measurements for the inset I was going to cut for the shelf to fit over the countertop lip.
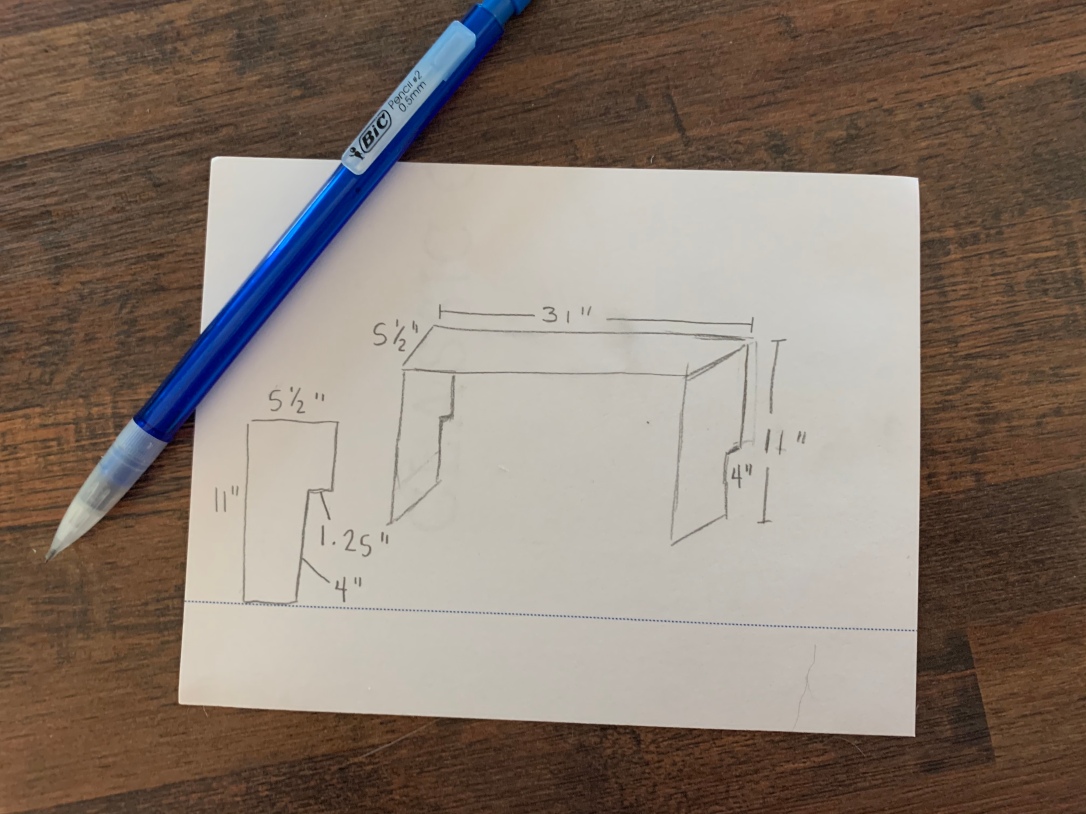
*I did make a mistake with my measurements however, which I didn’t discover until I had assembled the whole shelf. I hadn’t measured quite right for the width, so it was too tight and wouldn’t slide on top of the stove. To correct this, I changed my screw holes from the top to the side to gain extra width on the sides. However, I then lost the correct height for my side pieces. I correct this, I screwed on extra pieces of 1″ wood to the bottom of my side pieces. Don’t make my mistake…check your measurements! With that in mind, the rest of the directions are as if I hadn’t made this mistake and I was constructing it the right way.
2. With my diagram and measurements ready, I used my measuring tape, pencil and straight edge to layout my cut lines for the top and two side pieces.
3. Using my circular saw, I cut out all three pieces.
4. Once all the pieces were cut, I sanded the edges to eliminate any rough edges.
5. On the board that sits atop the side pieces, I pre-drilled four holes (two on each side), for my screws. I was careful to drill close to the edge, since the wood isn’t terribly thick and I wanted the screws to go through without splitting the side pieces once connected.


6. Holding one of the side pieces flush with the top shelf, I drilled in the two screws from the top board. I repeated the process with the other side. 
7. Since my board thickness was on the thinner side, I screwed in triangles of wood to the back, for extra support. I was able to achieve this only because there is a gap between the stove and the wall. This isn’t possible when the stove is flush against the wall.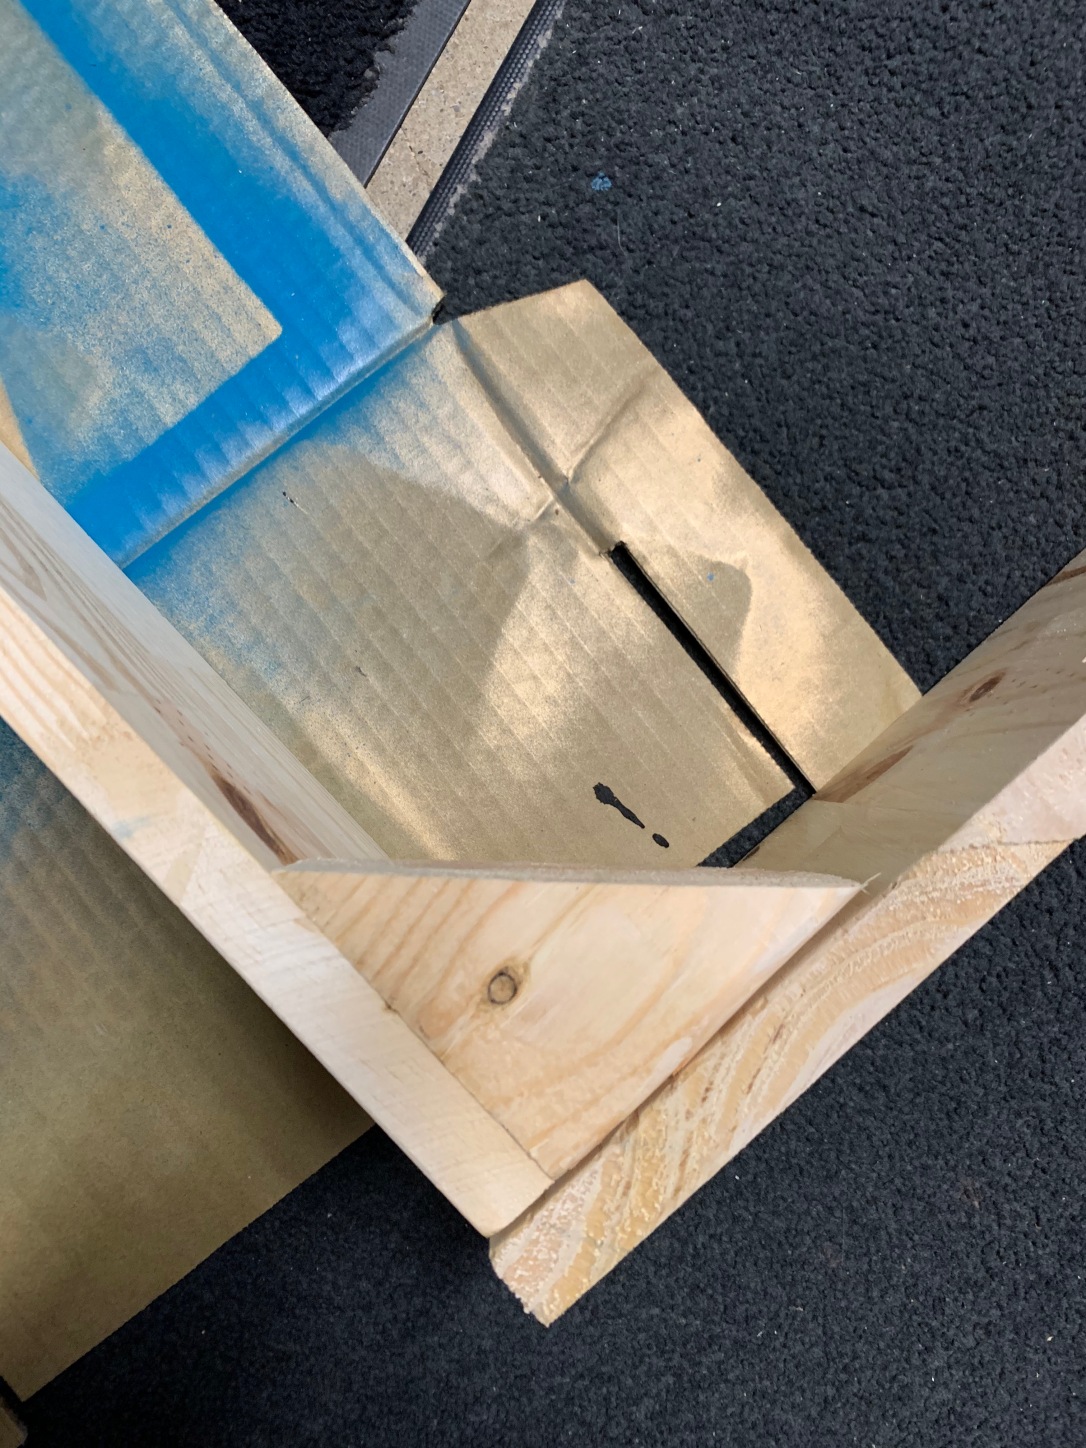
8. Once my entire shelf was assembled. I took my stain brush and covered the entire piece in a rich red mahogany. I wiped away any excess stain with a spare rag. I’ll be adding a coat of poly later on, I was just too excited to start using it and get a blog post up 🙂
All done! I love that I have an extra spot for storage, it covers the gap, and it adds a nice wood element similar to the countertops. The best part is, this project was entirely free for me since I already had all the supplies on hand from past projects! A win in my book.
It definitely has some imperfections with the cuts and screw holes, but I’ve been slowly learning wood-working, so it’s decent for my limited skill set. I’m also proud that I made it all myself! Hoo-hah!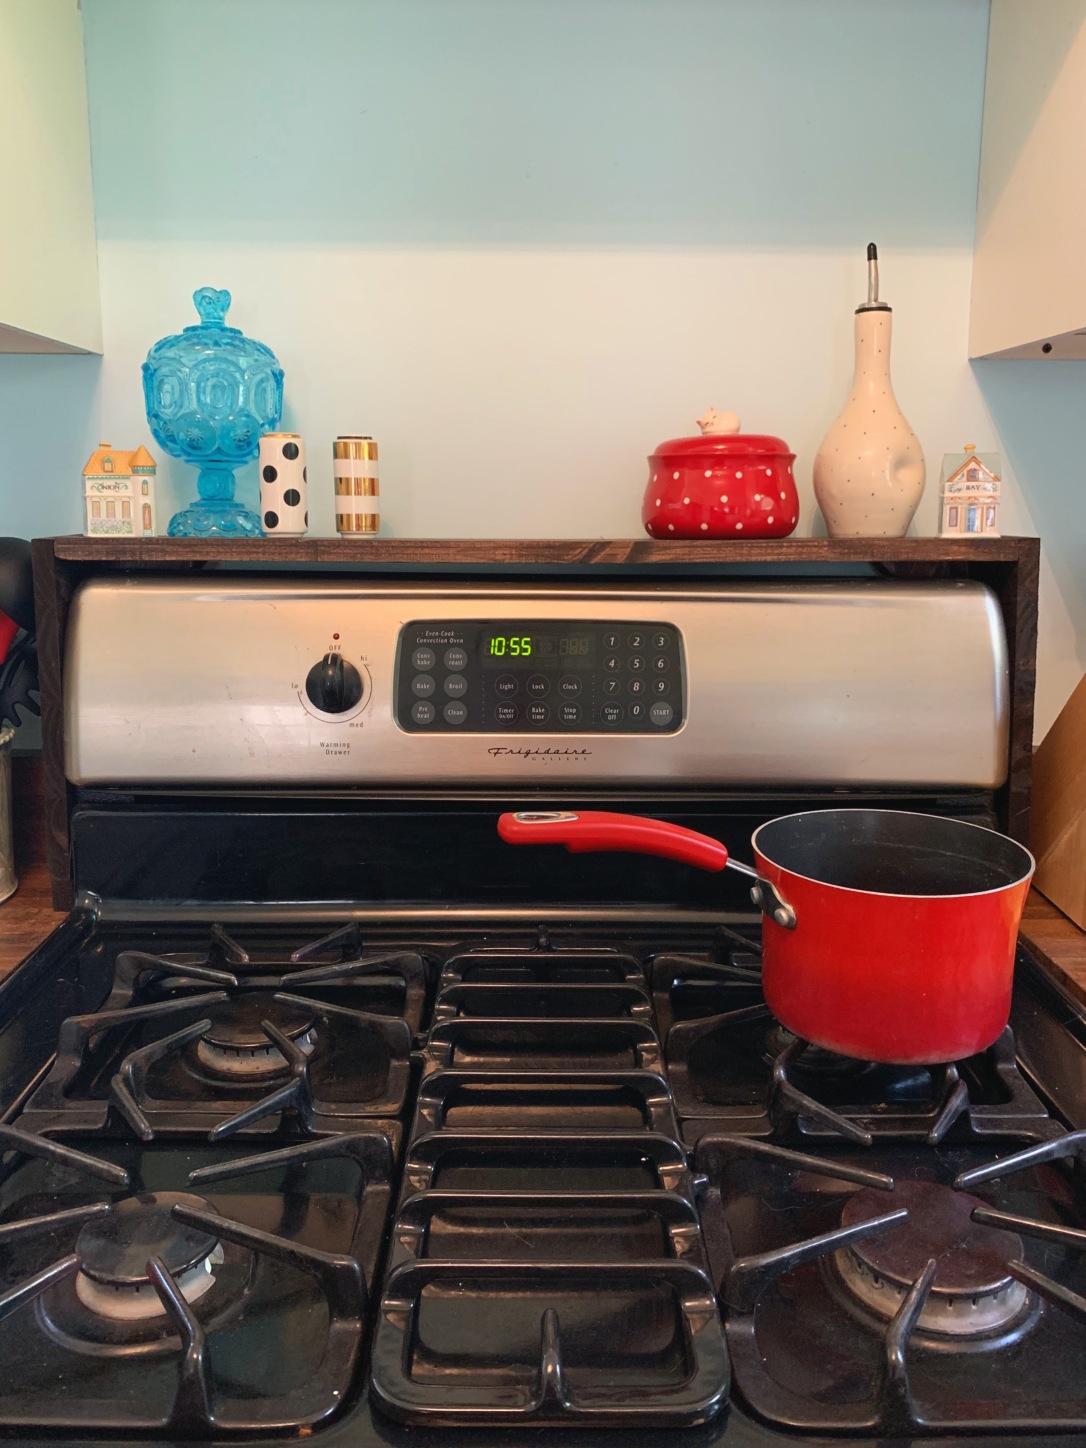


That looks fabulous, and so useful, too.
LikeLike
Thanks mom! It’s definitely a handy spot now in the kitchen
LikeLike